The Elvebak B&B is now open! I've been working on fixing up our guest room pretty much since April. Slowly. This room used to be the office but when our room mate moved out we switched rooms since his room was bigger and we spend most of our days in the office. The first thing that happened to the room was it got a new paint job. {I guess 2 rooms painted pink was too many} I bought the paint at the Habitat for Humanity ReStore, 1 can of barely used Behr for $3!
{before: when it was the office}
{before: after we switched rooms}

{after the paint + new night stands}
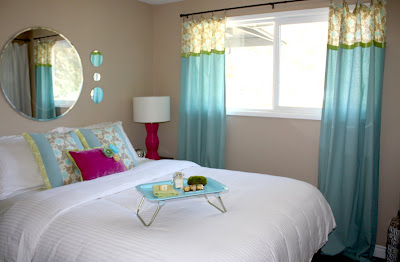
The room sat looking like this since pretty much since June. It served it's purpose, but was pretty darn boring. I knew that I wanted my color scheme to be chartreuse, turquoise, and yellow but was uninspired on what to do. Being on a budget also made it harder. I didn't want to spend too much money so I was trying to use things that we already had. It took a while, but everything finally came together and I couldn't be happier! Take a look:
{I sewed the curtains and toss pillows, and painted the breakfast tray, lamp, and frames}
Price break down:
Bedding, Mirrors, Curtains, Wall Hooks, Toss Pillows, Fabric, Pink Spray Paint, Lamp Shade, - $0 already had
Wall Paint - $3
Night stands - $15 Thrift Store
Lamp - $5 St. Vinny's
Breakfast Tray - $1.49 St. Vinny's
Frames around hooks - $1.50 garage sale
Ribbon for Curtains - $2.49 Micheal's
Alarm Clock - $1.49 St. Vinny's
Hanging Pottery Barn Lanterns - $10.96 Goodwill
Light Fixture - $2 garage sale
Blue Spray Paint - $3.00
Flowers on pink pillow - FREE {made by my friend Kara}
Now that's staying on a budget!
{more to come about the DIY projects}
1 dilemma I'm still facing is whether or not to paint the night stands. I think they would look good painted, but the wood is also nice - thoughts?
1 room is available.
Reservations are required! :-)


