Wednesday, August 3, 2011

DIY Clear View Shower Curtain

My first shower curtain I bought was a Cynthia Rowley 'Swell' Pop-Picnic pattern from target. {I loved it!!!! So much that I got the matching bedding & dishes.. good 'ol Target!} It was very hard to part with but as I've gotten older I think I've toned down my love for color, just a little.
{these were my sheets  - the shower curtain looked very similar, but at your eye level there was about a foot of clear so you could see out & it let extra light into the shower - Loved it!}
Since I've parted with my 'first love' shower curtain 3 years ago I've always copied the clear view idea and sewn my own into my new shower curtains. I've done 3 since, 2 everyday ones and 1 Christmas one. Here is a step by step to how it's done.
{before - gorgeous ruffle shower curtain from Urban Outfitters}
{after}
Materials needed: Shower curtain, 1 clear cheap shower curtain {$2.99 @ Target}, sewing pins, & measuring tape.
First, stand in your tub and determine where your head height is and make a mark on the back of the curtain so you know where to cut. Then determine how tall you want the clear view to be, {I do about 12"} keeping in mind the full length so it doesn't pool too much at the base. Our rod is a little higher than normal since Adam is 6' 3"! Take your shower curtain down and cut.
Lay out your clear vinyl and cut a strip a little wider than what you've determined you want. Since it's really hard to sew on the plastic shower curtain I've learned to put a small strip of scrap fabric along where your seam will be so your sewing machine foot doesn't get stuck while you're sewing. Layer your items: shower curtain, vinyl, then scrap fabric - pin all together.
Then sew! After the top section of your shower curtain is sewn to the strip of vinyl repeat steps and attach the bottom section.
Make sure to measure the distance between the bottom of the top section and the top of the bottom section to keep the distance the same all the way across before you pin.
Ta-Da!
Pretty simple fix to brightening up the shower and fixing the awkward "high-water" look where the curtain doesn't touch the floor and shows off just the base of your tub.
Our bathroom is just about complete!

Tuesday, August 2, 2011

Trudie's Adoption Party!

We "adopted" Trudie on June 5, 2010. We're guessing her birthday is around March 30, 2011. I wanted to have a birthday party for her and since it's raining in March we decided to have an Adoption Day Party! I made postcard invitations with an illustration of her I drew & invited all of her friends to her Adoption Birthday Bark-B-Q!
I made favors for all the doggies which was a treat for them and a beer cap magnets for their mom's & dad's. Everyone loved them!
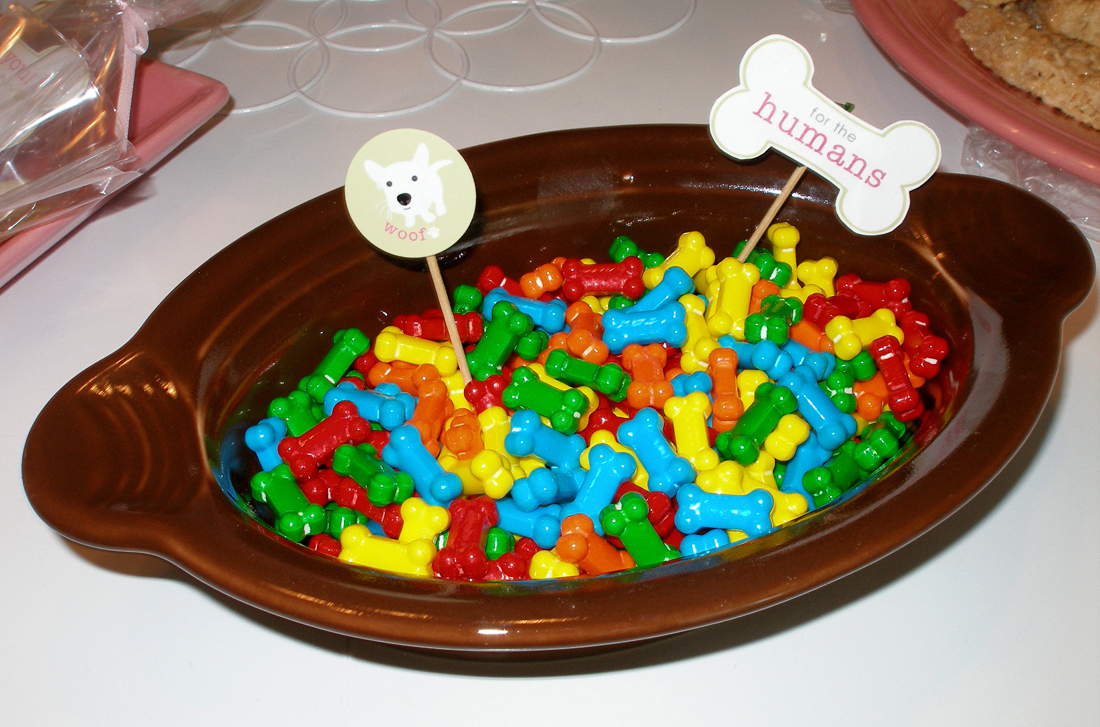
For the menu for 'the humans' we had Bark-B-Q'd Hot Dogs of course! & potato salad, dog bone shaped watermelon & rice crispy treats, scooby-snacks, scottie dog licorice, & dog bone candy.
For 'the dogs' I made ice cream treats aka Frosty Paws!
 Trudie had soo much fun playing with her friends she had to take a break in her bed.
Her friend Maya, got her a squeaky rope and a raw-hide birthday card! She LOVES the card! She still carries it around the house and since has chewed all the corners down.
The party turned out great - can't wait to plan her 2nd birthday party! :)

Here's the recipe I used to make the homemade Frosty Paws:
32 oz. plain yogurt
1 mashed banana or large jar of banana baby food
2 Tablespoons of peanut butter
2 Tablespoons of honey
Directions:
Blend all together and pour into an ice cube tray - freeze until ready to serve.

{Super easy & a fun summer treat for your pooch!}

Wednesday, July 20, 2011

More Strawberry Baking

Last weekend I rode my bike to the farmers market and met a friend. When riding a bike you're very limited to what you can buy, no more than what fits in your basket.. Well I ran into a deal too good to pass up. A whole flat of strawberries for $5! They were 2 day old berries so they were perfect for baking or jam, I had to get them! I didn't think I could use the whole flat myself so I split them with my friend, even better deal, $2.50 each! Already I had too much for my basket but I continued shopping and bought 2 baskets of blueberries, some green beans, & fresh cut dahlias. Since all of this did not fit in my bike basket I dropped it off at my friends car. After that Jaymee thought that she'd like to get another flat of berries to make freezer jam for gifts. So we walked back to the vendor selling the berries. To no surprise she was out of the $5 a flat strawberries, but she was shutting her booth down and offered us a whole flat of blackberries, for free! We accepted. We ended up splitting up the flats so we each got a half of strawberries and a half of blackberries - yum! Since all of this did not fit in my basket I ended up putting my bike in the back of my neighbors truck that was parked downtown and I got a ride home with Jaymee along with all my yummy and pretty purchases!
Now to the baking.. (Adam & I made 2 blackberry cobblers but I didn't take any pictures. We kept 1 for ourselves and gave 1 to a friend, use your imagination, they were yummy!)

With the strawberries I made another strawberry pie & a strawberry smoothie. I still had plenty of berries left and they needed to get used so I was trying to think of what else to make. That's when I remembered my friend Ashley's blog. She blogs about all the yummy and nutritious meals she makes for her cute little family! She posted weeks ago about about strawberry scones she made, yum! So I decided to give them a try.
and... They are delicious! & Huge! I cut each scone in half since they were so big.

 
I still had quite a few berries left so I was trying to come up with something else to make. I went to
allrecipes.com and searched for strawberries and found strawberry muffins. Sounded good and easy. I followed the recipe but I also added poppy seeds, yum! They turned out good! The next time I make them I want to try using applesauce instead of oil & maybe adding another fruit like blueberries or banana! I still have a few berries left, I might have to make another batch. :)
Here's the recipe:
  • 1/4 cup canola oil
  • 1/2 cup milk
  • 1 egg
  • 1/2 teaspoon salt
  • 2 teaspoons baking powder
  • 1/2 cup white sugar
  • 1 3/4 cups all-purpose flour
  • 1 cup chopped strawberries
  • {I added 1 tablespoon of poppy-seeds}
  1. Preheat oven to 375 degrees. Place paper liners in your muffin tin.
  2. In a small bowl, combine oil, milk, and egg. Beat lightly. In a large bowl, mix flour, salt, baking powder and sugar. Toss in chopped strawberries and stir to coat with flour. Pour in milk mixture and stir together.
  3. Fill muffin cups. Bake at 375 degrees F for 25 minutes, or until the tops bounce back from the top. 
I love Summer baking! enjoy!

Wednesday, June 22, 2011

Strawberry Season!

I'm so glad we are finally having some summerish weather! The berries are late this year, but at least they are getting ripe now. Yesterday I went to Davis Family Farm in Corvallis with my neighbor/friend and picked fresh strawberries! I picked just over 5lbs and only paid $0.90/per lb.! Last night with some of the berries I made my mom's famous strawberry pie & thought I would share - since it's soooo good!
{click on recipe to make larger}
{the crust makes enough for 2 pie pans!}
{Delicious!}
We usually just scoop how much crust we want into a dish then top with berries - then top with cool-whip so the crust never gets soggy!
for a few more summer berry recipes check out my post from last July {here}.

Enjoy!

Friday, June 10, 2011

Working on the yard

I can't wait for official summer & nice weather! I've been working in the yard every chance I get so it's ready to enjoy once the nice weather gets here (still waiting). Recently we rented a sod cutter and cut out an area that will eventually be a patio, and attempted to do an area that will eventually be a fire pit, but the ground was way too mushy! Our brother-in-law also came up and helped tear down and re-build our horrible-tipping-over fence! (THANK YOU TRAVIS!!!) here are some pictures of the progress. It will be done by next Saturday since we are having a Bark-B-Q for Trudie's first year since adoption party! :) Until then, here's what we've done so far.
{before - the fence was so old and rotted and provided no privacy from our neighbors lovely half painted house that has been like that since we moved in}
{so tired from "helping" all day}

{my plans for this area is to make an extended patio}
{new pretty flowers planted}
{this area was way too muddy to use the sod cutter so I will have to dig up the grass on my own - yuck!}
It doesn't look pretty yet, but I have plans! & only a week before Trudie's party to get it done!

Monday, April 25, 2011

Spring Savings from MonogramWedding.com !

MonogramWedding has a spring savings sale going on - right now through April 30th place any order from www.MonogramWedding.com and receive free shipping! Plus, lucky readers will also receive 10% off by entering in the discount code ABBY at checkout! Free shipping + 10% off = AWESOME!
All of their products can be completely customized to be for any occasion - so even if there isn't a wedding in your future you can make birthday, baby shower, bridal shower... invites - or you create a custom thank you card by uploading any photo. You get to type out the text, choose your font, choose your color - and a minimum order is only 25! Check out an option I made for Trudie's birthday invites.. :-) So cute!
 Happy Spring Savings!

Friday, April 8, 2011

Re-vamped Entry Bench

Our entry bench was a bargain from Target, purchased 2 years ago. I always had a plan to do something with it, but was content with it for now. Finally 1 night I had enough of looking at the 'Cat Scratch Fever' and decided it was time to do the something.
YIKES!
 
{before}
I really liked the tufting, and wanted to do something similar, but wasn't sure how I'd figure that one out so I went to JoAnn's and found some furry white fabric - perfect in a house with a white dog, gray cat, and orange cat that like to lay on the bench, and it's just fun! It's super furry so if they decided to scratch you couldn't tell at all - and if they lay on it it just fluffs back up. I at first thought I'd glue gun it on - not sure what I was thinking because that was a stupid idea! I then got smart and got out the staple gun - so easy!
Pulled and tucked and ta-da! 15 min makeover. The kids love it!
But, something wasn't right, I still wasn't happy with it.
The legs needed to be painted! Wish I would have thought of that before I covered the seat because painting around the fluff was super tricky - good thing they are both white! I did a light sand, then primed with Behr primer.

{This is what happened when I went out of the room for a second!}
{on the new rug.. it's a good thing it can be flipped over}
{the culprit!}
Got it cleaned up, then back to painting...
Once the primer dried I used Behr ultra high gloss white paint. I painted it on with my free roller from Valspar
I like this much better!
It really balances the room now. So easy, I love it!
Related Posts Plugin for WordPress, Blogger...